Git, TortoiseGit and (Putty) SSH keys for Windows
Okay, I finally got Git to work. Here's the necessary steps, after having installed msysgit and TortoiseGit.
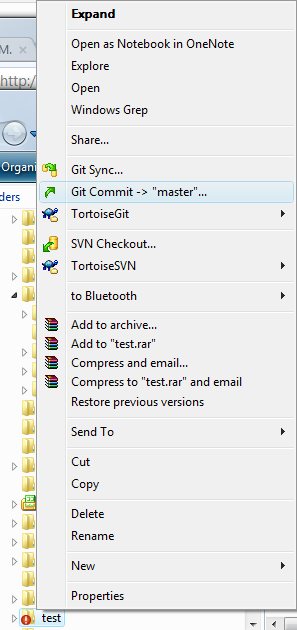
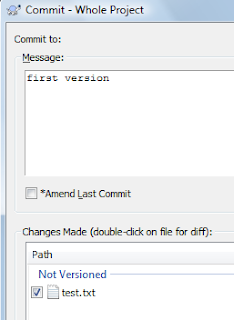
First, create the local repository.

You'll get a notification that an empty repository was created. You can now use the repository to track your changes.
But of course, you want to push this stuff to a server, as backup, because other people will collaborate on your project, etc. I'm using Unfuddle so I'll concentrate on that (check out Git for Windows Developers for info onGitHub).
Create a new Project in Unfuddle. Then, create a new repository and associate the repository to the project. Remember to choose Git as repository type.

Now you need to generate a public SSH key to authenticate yourself. If you installed TortoiseGit, you should have Puttygen installed too. Open it and generate a private and a public key.

Save the public key and the private key with the same filename, the only difference is that the private key should have a .ppk file extension. Also, copy the public key in the top part of the Putty Key Generator.
Now, in the Personal Settings of your Unfuddle account, create a new key and paste it accordingly.

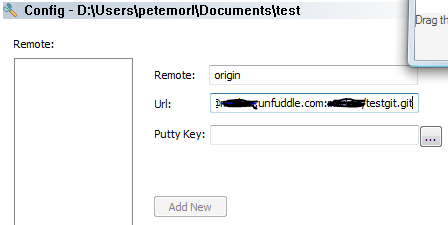
Now right-click on your local Git repository and choose 'Settings'. Go to the 'Remote' node and choose 'Add New'. Give it a name (TortoiseGit will suggest 'remote') and paste the URL you can find in Unfuddle. Point TortoiseGit to the correct (private) putty key.

Now you have one more thing to do. Start Pageant (C:\Program Files\TortoiseGit\bin\pageant.exe) if it hasn't already started, and add the private key you made a few steps earlier.

That's it! You can now right-click on your local repository and choose to Push to push your changes to Unfuddle.


Travelling through development: Git, TortoiseGit and (Putty) SSH keys for Windows
More than 3 requests, I'll translate this to Chinese.
超过3个请求,我就会把这篇文章翻译成中文。
No comments:
Post a Comment