EmailThis Premium lets you save unlimited bookmarks, PDF, DOCX files, PPTs and images. It also gives you a PDF copy of every page that you save. Upgrade to Premium →
Until now, we have always used the el property within our Vue instances to specify which HTML element our Vue instance should control. Or, more formally, which element the Vue instance should be mounted to. This means that we have to know which element the Vue instance should be mounted to when we declare the Vue instance, but we may not always know this. Therefore it is possible to mount the template dynamically, by using a method on the Vue instance. Let's start with the following code and change it as we go along.
<divid="app"><h1>{{ message }}</h1></div>
var vm = new Vue({ el: '#app', data: { message: 'Hello World!' } });
Let's first remove the el property, because we are no longer going to need that, as we are going to mount the template somehow else.
var vm = new Vue({ data: { message: 'Hello World!' } });
If we run the code, we will see that the curly brackets from the string interpolation are displayed, because Vue is no longer controlling the app element.
The Vue instance is now in an unmounted state, because it has no DOM element associated with it. We will get back to this later in this series when we talk about the lifecycle of Vue instances.
We can now call the $mount method on the Vue instance and pass in the same CSS selector as with the el property.
vm.$mount('#app');
This essentially does the same thing as the el property; it's just a way of manually initiating the mounting of an unmounted Vue instance. When we use the el property, this happens for us behind the scenes.
Now we see the message being output correctly.
Instead of passing in a CSS selector as the argument to the $mount method, we can actually pass in a native DOM element instead. Let's comment out our current template mount and see what it looks like.
vm.$mount(document.getElementById('app'));
Running the code now will give us the same result.
So mounting the template with the $mount method, is useful if you don't know which element the Vue instance should be mounted to at the time of instantiating the instance. If you do know this, then you should stick with the el property, as that's the most common approach. So if you can determine which element to mount to when creating the Vue instance, then you should just mount it immediately. Remember that you can pass a string variable to the el property if you need to apply some logic to determine the CSS selector.
If you need to create a Vue instance and then mount it later – for whatever reason – then use the $mount method. This method gives some additional flexibility, such as defining an inline template within the Vue instance, which we'll take a look at next.
EmailThis Premium lets you save unlimited bookmarks, PDF, DOCX files, PPTs and images. It also gives you a PDF copy of every page that you save. Upgrade to Premium →
LARAVEL at most awesome than others PHP framework. It is friendly with those programmers (in general programmer who is starting MVC), it is friendly with those mid level programmers (whom want to dive advance level programming concepts like as deepest part of OOP, design pattern, how to improve coding etc.), it is friendly with those programmers whom are full fill above two steps and want to write awesome packages for the community. It is modern because Laravel adapted almost everything of modern PHP languages besides not only PHP it also adapted others languages concept like IOC(inversion of control) design principle although IOC is an extended feature of DI, lararvel did it very smartly and of course many other things, I am not going to discuss all about here.
Today I am going to discuss Vue Js with laravel and having complete a CRUD application using Laravel Resource API. So let's dive into it.
Step by step, I am going to show it you in here.
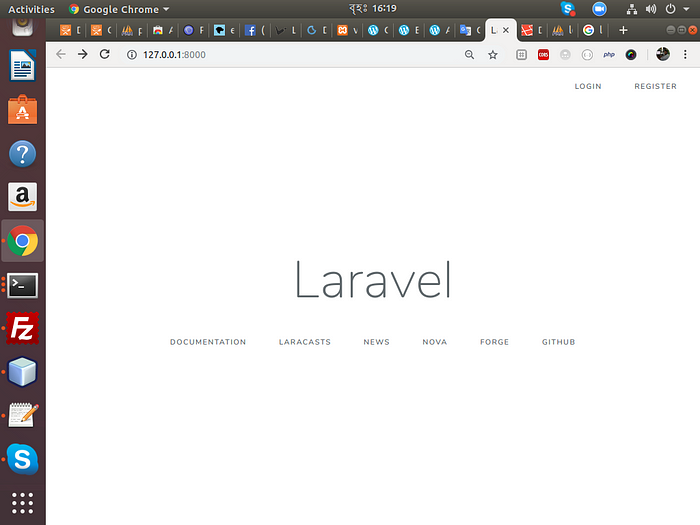
1st step
---------------
I am going to download latest Laravel Framework using composer ( you have to basic knowledge about composer) .$ composer create-project --prefer-dist laravel/laravel LaravelCrudVueHere LaravelCrudVue is our project directory or project folder, after download is completed cd(change directory) LaravelCrudVue. Inside LaravelCrudVue run below artisan command in your command line.$ php artisan serveLaravel development server started: <http://127.0.0.1:8000>
2nd Step
---------
Now it is time to create your database schema for simple CRUD application with Vue Js.For that now I am going to execute artisan migration command.$ php artisan make:migration create_posts_tableAfter executed this command our migration file is created inside database/migrations folder with name 2018_10_06_140912_create_posts_table.php,
open up the file and it's content looks like below.
use Illuminate\Support\Facades\Schema;
use Illuminate\Database\Schema\Blueprint;
use Illuminate\Database\Migrations\Migration; class CreatePostsTable extends Migration {
/** * Run the migrations. * * @return void */
    public function up() {
        Schema::create('Posts', function (Blueprint $table) {
            $table->increments('id');
            $table->timestamps();
        });
    }    /**
     * Reverse the migrations.
     *
     * @return void
     */
    public function down()
    {
        Schema::dropIfExists('books');
    }
}At the beginning it is exposed as a template, we have to reassemble it with our needs. In addition I am creating another four columns inside our up method of our migration file.$table->string('title');
$table->text('post_content');
$table->string('email')->unique();
$table->string('author');Now our migration file looks like below.
use Illuminate\Support\Facades\Schema;
use Illuminate\Database\Schema\Blueprint;
use Illuminate\Database\Migrations\Migration; class CreatePostsTable extends Migration {
/** * Run the migrations. * * @return void */
    public function up() {
        Schema::create('Posts', function (Blueprint $table) {
            $table->increments('id');
            $table->string('title');
            $table->text('post_content');
            $table->string('email')->unique();
            $table->string('author');
            $table->timestamps();
        });
    }    /**
     * Reverse the migrations.
     *
     * @return void
     */
    public function down()
    {
        Schema::dropIfExists('books');
    }
}Up to this I want to stop extending my migration file, so then it is time to migrate our file. So execute the migrate artisan command like below.$ php artisan migrateNow check database our posts table is created.3rd Step
---------
In the 3rd step I am going to create a factory for our post table to generate 100 fake records into posts table.
To execute our factory command use$ php artisan make:factory PostFactory --model=Post , the flag --model I have used to indicate our post model calss, though it is not created yet, In future I will create it. Now our PostFactory.php file is created inside database/factories folder, open up PostFactory.php file and it looks like below.define(App\Post::class, function (Faker $faker) {
    return [
             //
    ];
});Now it is time to define factory array to populate our data, and my new array look like below.return [
        'title' => $faker->sentence($nbWords = 10),
        'post_content' => $faker->paragraph($nbSentences = 15),
        'email' => $faker->safeEmail,
        'author' => $faker->name
    ];Of course I have used faker. so our completed PostFactory looks like,define(App\Post::class, function (Faker $faker) {
    return [
        'title' => $faker->sentence($nbWords = 10),
        'post_content' => $faker->paragraph($nbSentences = 15),
        'email' => $faker->safeEmail,
        'author' => $faker->name
    ];
});
Here I have taken 10 words for my post title, and taken 15 sentences for my post content and obviously taken a safe email and author from faker name object.
Here, I am not going to tinker to generate fake records, I will do it using seeder. So for that go inside database/seeds open up DatabaseSeeder.php file, insert factory(Post::class, 100)->create(); into the run method, after that open your command line run below artisan command.
$ php artisan db:seed
Check your posts table 100 fake records is created, awesome.
please don't exhaust yourself, cool, more attention please, interesting part will started with vue js.
4th Step
---------
In this step I am going to create our model,PostsController and another controller for API resource controller and at last API resource. So, than at first create our post model, to execute our model write below command.$ php artisan make:model Postcheck inside the api folder Post.php is created, open up Post.php, namespace App;use Illuminate\Database\Eloquent\Model;class Post extends Model
{
    //
}After created our model, now I am going to create our controller class for our application route, few minutes later you will understand why I have created PostsController, run artisan command make:controller into your favorite command line,$ php artisan make:controller PostsControllerInside your api/Http/Controllers folder PostController.php is created, and it looks like below,namespace App\Http\Controllers;use Illuminate\Http\Request;class PostController extends Controller
{
    //
}Now it is time to create our resource API controller, it is almost same as like as resource controller, main difference is that when you create a controller with flag --api, then the controller exclude create and edit method form its skeleton, otherwise wise its behavior like as resource controller, let's start to create our api resource controller, inside your project directory open up your command line, run below artisan command.$ php artisan make:controller Api/PostController --apiNow it is time to check that how look like our api resource controller? inside our app/Http/Controllers/Api PostController.php is created, open up the file and examine the skeleton, it looks like resource controller, without create and edit method,namespace App\Http\Controllers\Api;use Illuminate\Http\Request;
use App\Http\Controllers\Controller;class PostController extends Controller
{
    /**
     * Display a listing of the resource.
     *
     * @return \Illuminate\Http\Response
     */
    public function index()
    {
        //
    }    /**
     * Store a newly created resource in storage.
     *
     * @param  \Illuminate\Http\Request  $request
     * @return \Illuminate\Http\Response
     */
    public function store(Request $request)
    {
        //
    }    /**
     * Display the specified resource.
     *
     * @param  int  $id
     * @return \Illuminate\Http\Response
     */
    public function show($id)
    {
        //
    }    /**
     * Update the specified resource in storage.
     *
     * @param  \Illuminate\Http\Request  $request
     * @param  int  $id
     * @return \Illuminate\Http\Response
     */
    public function update(Request $request, $id)
    {
        //
    }    /**
     * Remove the specified resource from storage.
     *
     * @param  int  $id
     * @return \Illuminate\Http\Response
     */
    public function destroy($id)
    {
        //
    }
}
Be attentive please, I know this is a long tutorial, that's why I am trying to expose it step by step. After completed our resource api controller, now I am going to create our API resource.
When building an API, you may need a transformation layer that sits between your Eloquent models and the JSON responses that are actually returned to your application's users. Laravel's resource classes allow you to expressively and easily transform your models and model collections into JSON.
So, let's start to create our API resource, inside your project directory open your command line run these two command below,
$ php artisan make:resource Post
and
$ php artisan make:resource PostCollection
After executed these commands you will see a folder name resources is created inside app\Http, and inside that directory Post.php and PostCollection.php API resource file have been created, open up two files and they are look like below.
namespace App\Http\Resources;
use Illuminate\Http\Resources\Json\JsonResource;
class Post extends JsonResource { /** * Transform the resource into an array. * * @param \Illuminate\Http\Request $request * @return array */ public function toArray($request) { return parent::toArray($request); } }
namespace App\Http\Resources;use Illuminate\Http\Resources\Json\ResourceCollection;class PostCollection extends ResourceCollection
{
    /**
     * Transform the resource collection into an array.
     *
     * @param  \Illuminate\Http\Request  $request
     * @return array
     */
    public function toArray($request)
    {
        return parent::toArray($request);
    }
}
Now reopen our API resource controller, go to app\Http\Controllers\Api\PostController.php, at fist import our Post resource class and Post model, after that paste this line return new PostResource(Post::first()); into the index method.
5th step
--------
namespace App\Http\Controllers\Api;use Illuminate\Http\Request;
use App\Http\Controllers\Controller;
use App\Http\Resources\Post as PostResource;
use App\Post;class PostController extends Controller
{
    /**
     * Display a listing of the resource.
     *
     * @return \Illuminate\Http\Response
     */
    public function index()
    {
        return new PostResource(Post::first());
    }    /**
     * Store a newly created resource in storage.
     *
     * @param  \Illuminate\Http\Request  $request
     * @return \Illuminate\Http\Response
     */
    public function store(Request $request)
    {
        //
    }    /**
     * Display the specified resource.
     *
     * @param  int  $id
     * @return \Illuminate\Http\Response
     */
    public function show($id)
    {
        //
    }    /**
     * Update the specified resource in storage.
     *
     * @param  \Illuminate\Http\Request  $request
     * @param  int  $id
     * @return \Illuminate\Http\Response
     */
    public function update(Request $request, $id)
    {
        //
    }    /**
     * Remove the specified resource from storage.
     *
     * @param  int  $id
     * @return \Illuminate\Http\Response
     */
    public function destroy($id)
    {
        //
    }
}Now, it is time to check our api routes, to do so, we have to open up route file, inside routes folder open api.php, paste this line in the last Route::apiResource('posts','PostsController').Route::middleware('auth:api')->get('/user', function (Request $request) {
    return $request->user();
});Route::apiResource('posts','PostController');Awesome, now api routes are ready for production.
to check our api route lists run artisan command below
$ php artisan route:list
GET    api/posts              | posts.index      | App\Http\Controllers\Api\PostController@index
POST   api/posts              | posts.store      | App\Http\Controllers\Api\PostController@store
GET    api/posts/{post}       | posts.show       | App\Http\Controllers\Api\PostController@show
PUT    api/posts/{post}       | posts.update     | App\Http\Controllers\Api\PostController@update
DELETE api/posts/{post}       | posts.destroy    | App\Http\Controllers\Api\PostController@destroy
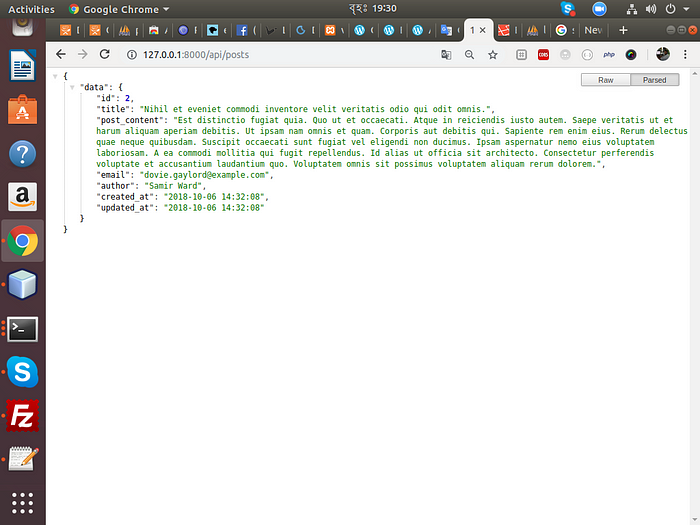
Let's check our first api route, remember our resource API controller index method will response data using API resource, recall your memory, we already wrote this line into the index method return new PostResource(Post::first()); , so open your favorite browser and hit http://127.0.0.1:8000/api/posts
If you look at the response data, you have seen that every column value is responded into the json object, But we are not want to response everything, so that's why we will need to control over it, and need to transform it into a JSON structure laravel do it for us API resource awesome and many thanks to taylor, for that open up Post.php resource file inside app\Http\Resources\Post.php and change it like below,
namespace App\Http\Resources;use Illuminate\Http\Resources\Json\JsonResource;class Post extends JsonResource
{
    /**
     * Transform the resource into an array.
     *
     * @param  \Illuminate\Http\Request  $request
     * @return array
     */
    public function toArray($request)
    {
        //return parent::toArray($request);
        return [
          'id' = $this->id,
          'title' = $this->title,
          'post_content' = $this->post_content,
          'email' = $this->email,
          'author' = $this->author
        ];
    }
}
Awesome, output as it is we want, now we want to response collection of json objects, for that we have to use PostCollection, we don't need to do anything into this file for the time being, many more things you can do for that please read full documentation from https://laravel.com/docs/5.7/eloquent-resources, our collective response is controlled by our Post resource. For collective response open up our resource API controller inside app\Http\Controllers\Api\PostController.php and alongside I am going to productive rest of the methods of the file, and then our resource API controller look like below.
namespace App\Http\Controllers\Api;use Illuminate\Http\Request;
use App\Http\Controllers\Controller;
use App\Http\Resources\Post as PostResource;
use App\Http\Resources\PostCollection;
use App\Post;class PostController extends Controller
{
    /**
     * Display a listing of the resource.
     *
     * @return \Illuminate\Http\Response
     */
    public function index()
    {
        return new PostCollection(Post::paginate(3));
    }    /**
     * Store a newly created resource in storage.
     *
     * @param  \Illuminate\Http\Request  $request
     * @return \Illuminate\Http\Response
     */
    public function store(Request $request)
    {
        //I am not doing validation here        $post = new Post();
        $post->title = $request->title;
        $post->post_content = $request->post_content;
        $post->email = $request->email;
        $post->author = $request->author;
        $post->save();                return new PostResource($post);
    }    /**
     * Display the specified resource.
     *
     * @param  int  $id
     * @return \Illuminate\Http\Response
     */
    public function show($id)
    {
        return new PostResource(Post::FindOrFail($id));
    }    /**
     * Update the specified resource in storage.
     *
     * @param  \Illuminate\Http\Request  $request
     * @param  int  $id
     * @return \Illuminate\Http\Response
     */
    public function update(Request $request, $id)
    {
        //I am doing validation here
        $post = Post::findOrFail($id);
        $post->title = $request->title;
        $post->post_content = $request->post_content;
        $post->email = $request->email;
        $post->author = $request->author;
        $post->save();                return new PostResource($post);
    }    /**
     * Remove the specified resource from storage.
     *
     * @param  int  $id
     * @return \Illuminate\Http\Response
     */
    public function destroy($id)
    {
        $post = Post::findOrFail($id);
        $post->delete();                return new PostResource($post);
    }
}
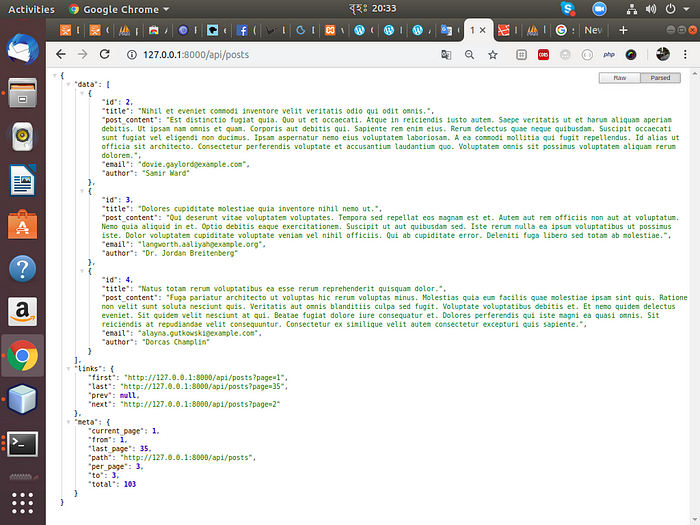
Remember now our response will be a collection, because we have used return new PostCollection(Post::paginate(3)); instead of PostResponse(Post::first()); check it in browser http://127.0.0.1:8000/api/posts
Awesome, it is real API response.
Guys I apologize, I am not going to expose insert, update, delete here using postman, because this article already going to huge, I promise I am showing it in the Vue part.
Everything is ready, now it is time to dive into Vue with laravel, at first I want to clear it in here, that this is not a single page application, that's why I am not using vue-router here, I am only use vou-resource (this.$http.post, this.$http.get, this.$http.put, this.$http.delete) . And remember I said in this article why I have created a controller PostController inside controller folder, not that PostController inside our App\Http\Controllers\Api.
So, open up our PostController from App\Http\Controllers\PostController.php as well as create two views inside resources/views/blogDashBoard.blade.php and resources/views/add-post.blade.php
namespace App\Http\Controllers;use Illuminate\Http\Request;class PostController extends Controller
{
    /*
    *Post lists
    */
    public function index() {
        return view('blogDashBoard');
    }    /*
    *Post form
    */
    public function addPost() {
        return view('add-post');
    }
}
Now define our web routes, open up web.php route file.
/*
|--------------------------------------------------------------------------
| Web Routes
|--------------------------------------------------------------------------
|
| Here is where you can register web routes for your application. These
| routes are loaded by the RouteServiceProvider within a group which
| contains the "web" middleware group. Now create something great!
|
*/Route::get('/', function () {
    return view('welcome');
});//For the time being exclude from authenticationRoute::get('blogDashboard','PostController@index')->name('blog-dashboard');
Route::get('add-post','PostController@addPost')->name('add-post');Auth::routes();Route::get('/home', 'HomeController@index')->name('home');
Now open our add-post.blade.php and blogDashBoard.blade.php file, in blogDashBoard.blade.php I have added a link add-post and in future will be shown blog lists here using Vue component, in the add-post.blade.php template file our add-post form will be shown using Vue component.
After that open up our welcome.blade.php file and add a link(<a href="{{ route('blog-dashboard') }}">Blog List</a>) before login route inside @else directive, to show our blog lists
So everything is ready now ready to work with vue, before that you have to ensure you have installed node js and npm if not you could do that from https://nodejs.org/en/, after completed node js and npm installation It is time to create our PostsComponent.vue and addPost.vue inside resources/js/components folder, our addPost.vue and PostsComponent.vue looks like below. Just copy and paste.
Our addPost.vue simple enough, I am explaining about PostsComponent file there is a block for message {{actionmsg}}, whenever any insert,update or delete is occurred message will be shown here, after that I have placed a bootstrap 4 modal block for record edit form, in the modal form I have used @submit.prevent="updatePost", here .prevent directive is used to prevent default behavior of the submit button on the other hand each input has v-model directive for two way data bindings.
After the modal edit form I have another modal for showing a permission message before deletion the record.
Note: Guys this is not Vue Js tutorial, so I am not discuss all things about vue.
In the code block I have taken a single post object inside data, also an empty laravelData object for laravel-vue-pagination because we have to pass laravelData as props using v-bind:data="laravelData" into the pagination tag and so on another property I have taken for necessity, remaining code is very simple like postLists(page) which is used for listing our post and call it from mounted life cycle hook, editPost(postid) is used for populate post edit form than updatePost() is used to change as a edited record into database and at last deletePost() to delete a post from database, hope you realize :).
Now time to import our vue components into root component, open up our app.js inside resources/js/app.js.
app.js
--------------------------/**
 * First we will load all of this project's JavaScript dependencies which
 * includes Vue and other libraries. It is a great starting point when
 * building robust, powerful web applications using Vue and Laravel.
 */require('./bootstrap');window.Vue = require('vue');var Vue = require('vue');
/**
 * Next, we will create a fresh Vue application instance and attach it to
 * the page. Then, you may begin adding components to this application
 * or customize the JavaScript scaffolding to fit your unique needs.
 *///Vue.component('posts-component', require('./components/PostsComponent.vue'));import postComponent from './components/PostsComponent.vue';
import addPost from './components/addPost.vue';
import VueResource from 'vue-resource';
import BootstrapVue from 'bootstrap-vue'
Vue.component('pagination', require('laravel-vue-pagination'));Vue.use(VueResource);
Vue.use(BootstrapVue);
Vue.http.headers.common['X-CSRF-TOKEN'] = $('meta[name="csrf-token"]').attr("content");const app = new Vue({
    el: '#app',
    components: {
        'posts-component':  postComponent,
        'add-post': addPost
    }
});
add <posts-component></posts-component> into blogDashBoard.blade.php file, reopen blogDashBoard.blade.php file.