The introduction of Windows Linux Subsystem and Bash on Ubuntu on Windows 10 with the Windows 10 Anniversary Update represented a substantial gain for developers and power users using the Windows 10 platform. I eagerly installed the beta feature shortly after finishing the Windows update. However, upon launching my brand spankin’ new bash terminal, I noticed that the terminal retained the appearance of command prompt instead of resembling that of the terminal in the Linux distribution.
To make your terminal match the appearance of the Ubuntu Terminal, follow this guide.
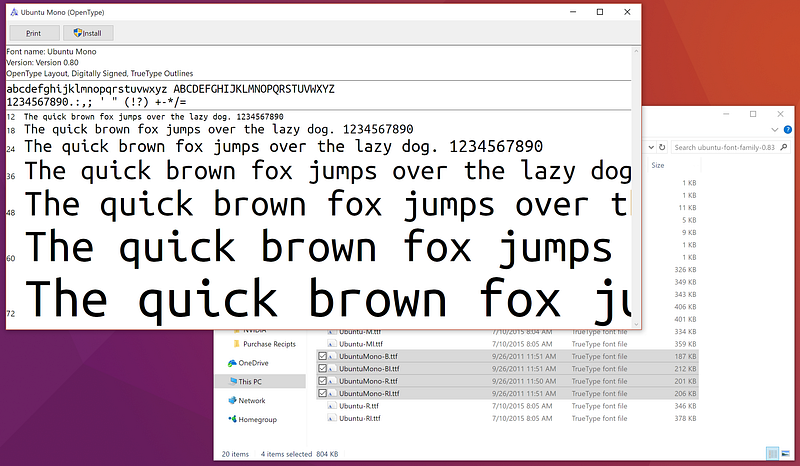
To start, we will need an official Ubuntu font. Head to this Ubuntu website to download the official Ubuntu fonts for free.
Once you’ve saved the .zip file, extract the contents and open the folder that was previously inside the .zip download. Inside that folder, you will find four .ttf font files with names starting with “UbuntuMono”:
- “UbuntuMono-B.ttf” — the Ubuntu Mono font’s bold variant,
- “UbuntuMono-BI.ttf” — the Ubuntu Mono font’s bold and italicized variant,
- “UbuntuMono-R.ttf” — the Ubuntu Mono font’s regular variant;
- “UbuntuMono-RI.ttf” — the Ubuntu Mono font’s italicized variant.
Install these four fonts by clicking the “Install” button in the Windows Font Viewer windows when you open each of these fonts.
Next, we will change the bash window to use the Ubuntu Mono font.
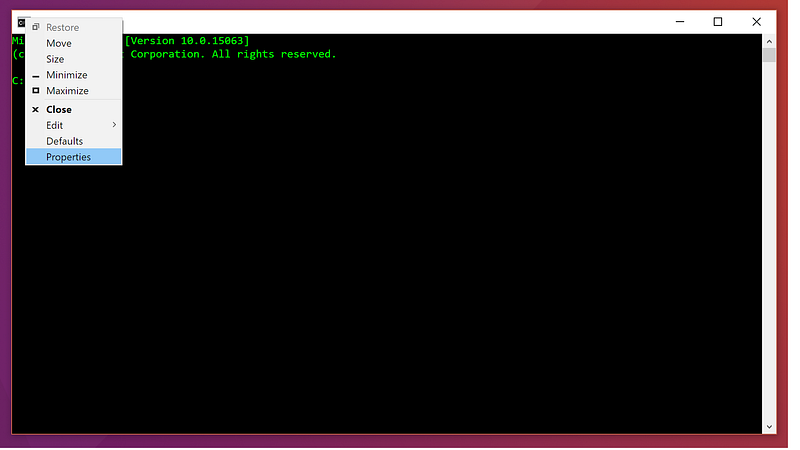
Open up Bash on Ubuntu on Windows 10.* Right-click the little icon in the upper left hand corner of the window and select “Properties”. You can also do this with the “Defaults” option, but that will change the appearance of Command Prompt windows as well as Bash windows. Some people may prefer this, but I recommend starting with “Properties” in Bash if you’re not sure if you will like the new look.
*If this is your first time launching Bash on Ubuntu on Windows 10, you will have to complete the first time setup. Do this first if you have not done it already.
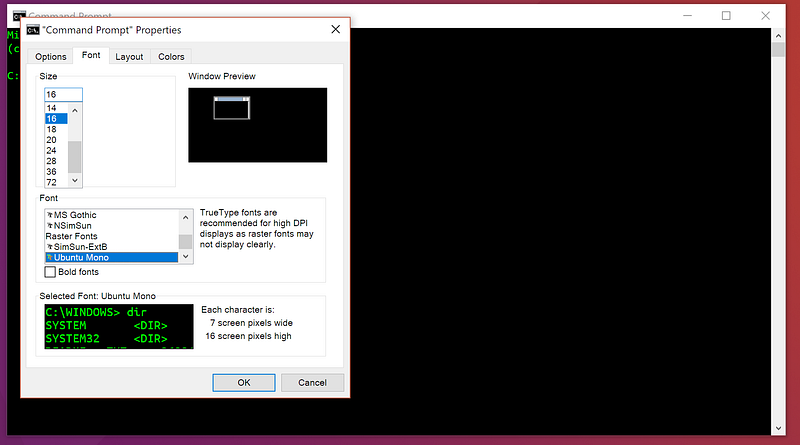
From the new window that should have popped up, select the “Font” tab. You will see a section appropriately named “Font” with a list of fonts. Select the recently installed “Ubuntu Mono” font.
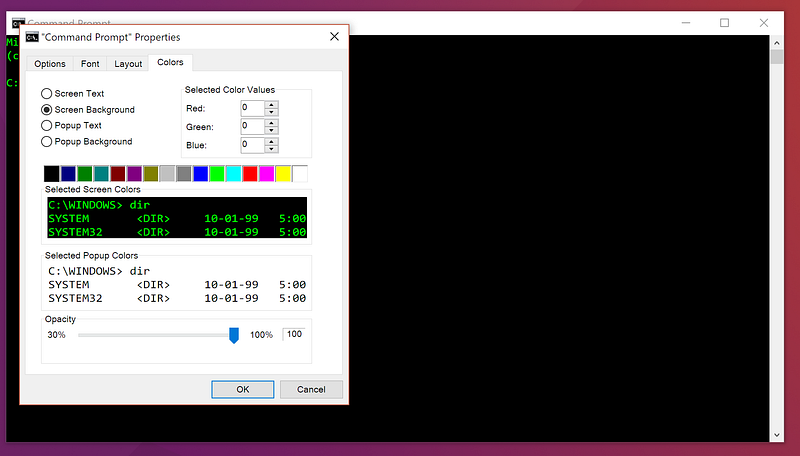
Next, move on to the “Colors” tab.
The default colors panel should look something like this:
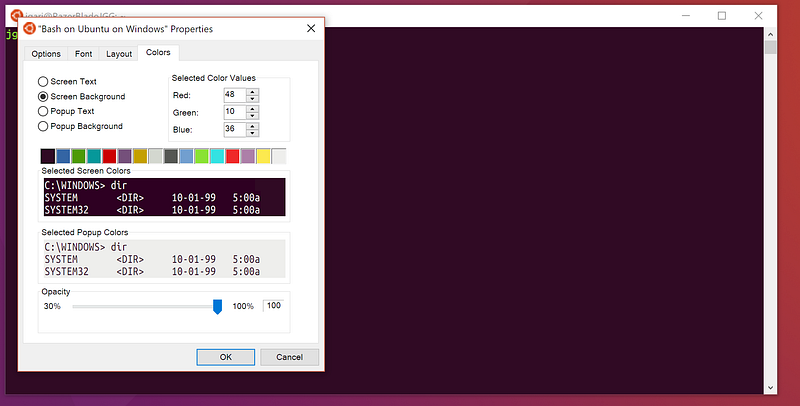
Our goal is to make it look like this:
This part of the process is the most tedious, but also the most rewarding.
In the corresponding color slots, change the RGB values to the following:
Slot 1:
Slot 2:
Slot 3:
Slot 4:
Slot 5:
Slot 6:
Slot 7:
Slot 8:
Slot 9:
Slot 10:
Slot 11:
Slot 12:
Slot 13:
Slot 14:
Slot 15:
Slot 16:
Red: 48, Green: 10, Blue: 36Slot 2:
Red: 52, Green: 101, Blue: 164Slot 3:
Red: 78, Green: 154, Blue: 6Slot 4:
Red: 6, Green: 152, Blue: 154Slot 5:
Red: 204, Green: 0, Blue: 0Slot 6:
Red: 117, Green: 80, Blue: 123Slot 7:
Red: 196, Green: 160, Blue: 0Slot 8:
Red: 211, Green: 215, Blue: 207Slot 9:
Red: 85, Green: 87, Blue: 83Slot 10:
Red: 114, Green: 159, Blue: 207Slot 11:
Red: 138, Green: 226, Blue: 52Slot 12:
Red: 52, Green: 226, Blue: 226Slot 13:
Red: 239, Green: 41, Blue: 41Slot 14:
Red: 173, Green: 127, Blue: 168Slot 15:
Red: 252, Green: 233, Blue: 79Slot 16:
Red: 238, Green: 238, Blue: 238
Now, make sure the “Screen Text” and “Popup Background” are set to the near-white color of slot 16 and the “Screen Background” and “Popup Text” are set to deep purple color of slot 1. Click the “OK” button.
You’re done! Enjoy
cd-ing and grep-ing all you want with your newly colored Ubuntu Bash Terminal!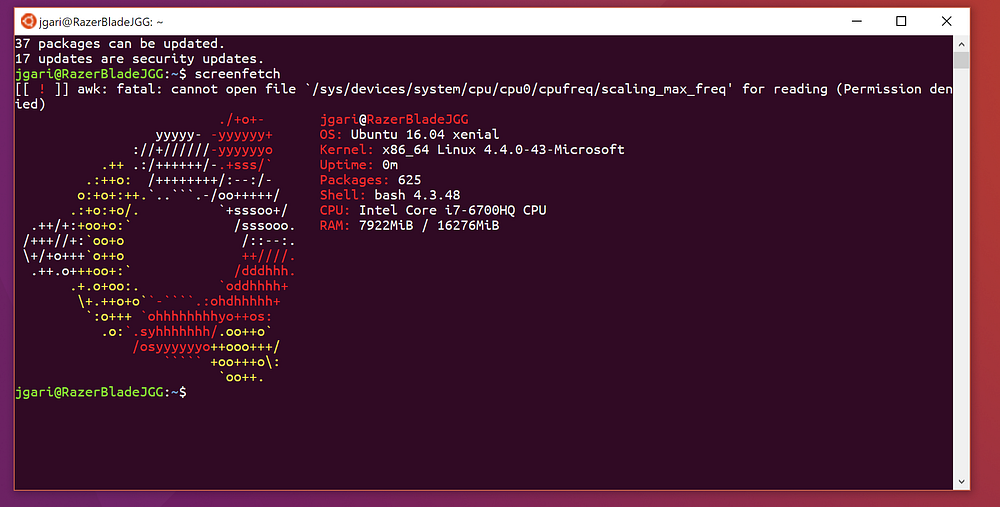
No comments:
Post a Comment